

Zoonie from Fireball XL5 ( Gerry Anderson TV series from the 1960's )
I made this character to compliment the robot I am currently working on and both will be in scale with the studio models. Unlike the original this is not strictly a puppet/marionette as it was intended as a display model.
I decided I would use traditional construction as in vintage compostion dolls and does not involve 'high tech' materials. Sizes were taken from pictures captured from video footage and balloons inflated to approximate size were used as the mould forms. At least 12 layers of tissue paper glued together with wood pva glue and left to dry before moving on to shape the forms. Studying the pictures and then modifying the shape using card , layers of folded tissue paper and strips of plaster bandage.
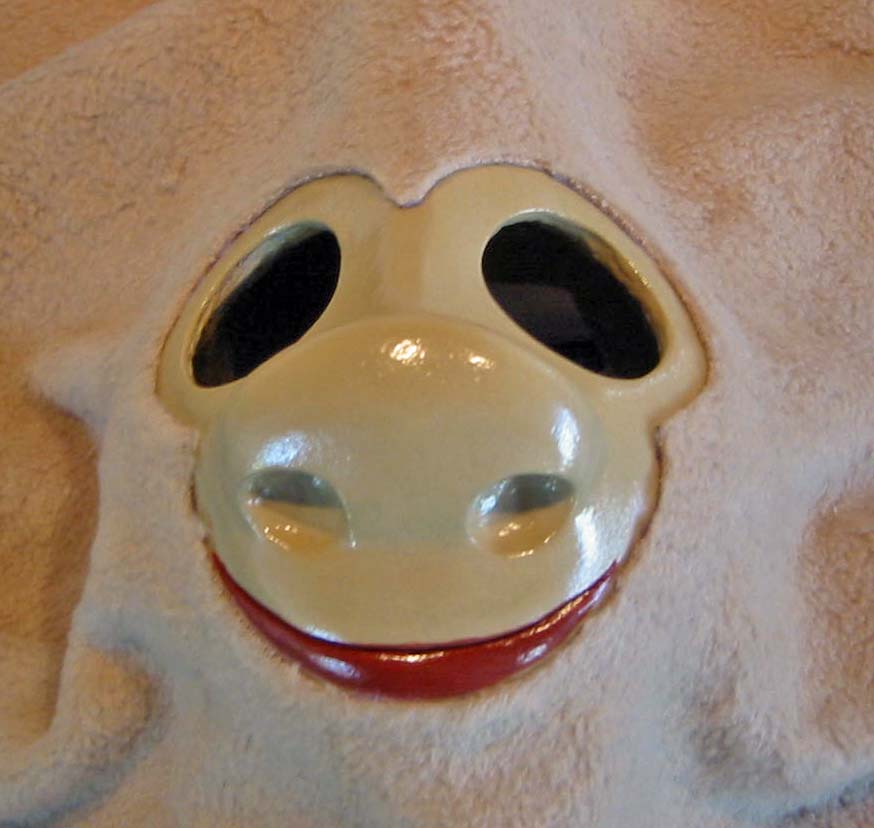
More attention was paid to the head in order to get a good likeness and it is best to have breaks from working on it then return to see where changes need to be made. You can probably see from the picture that the nose was built up from folded and 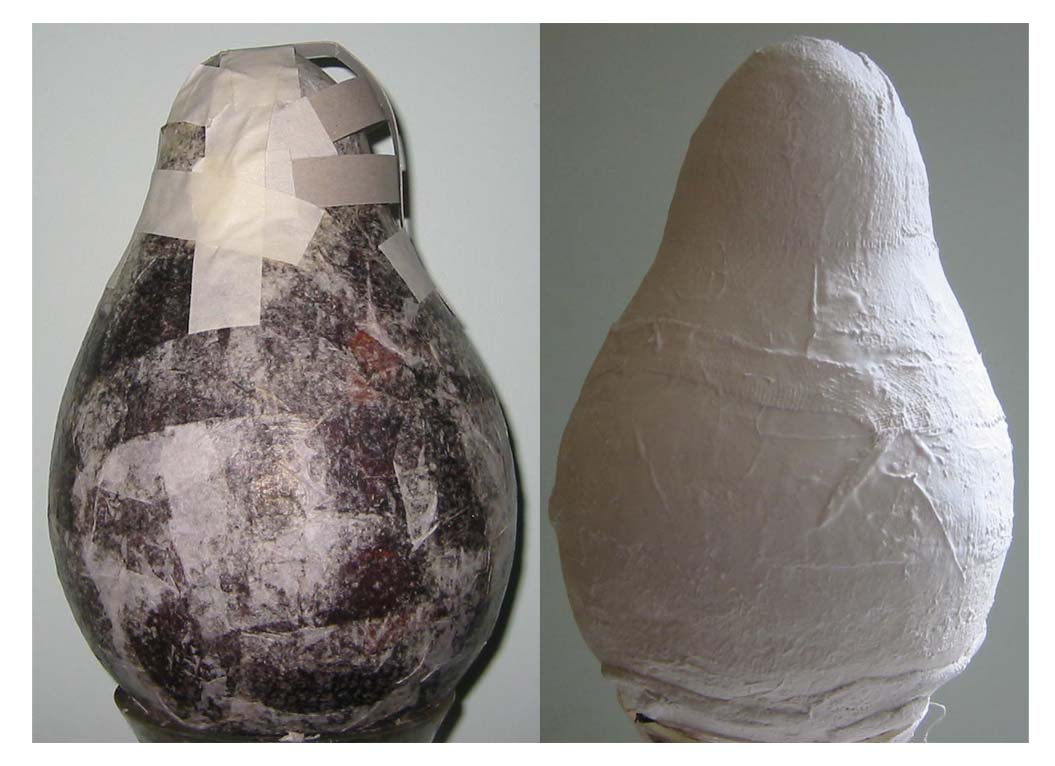
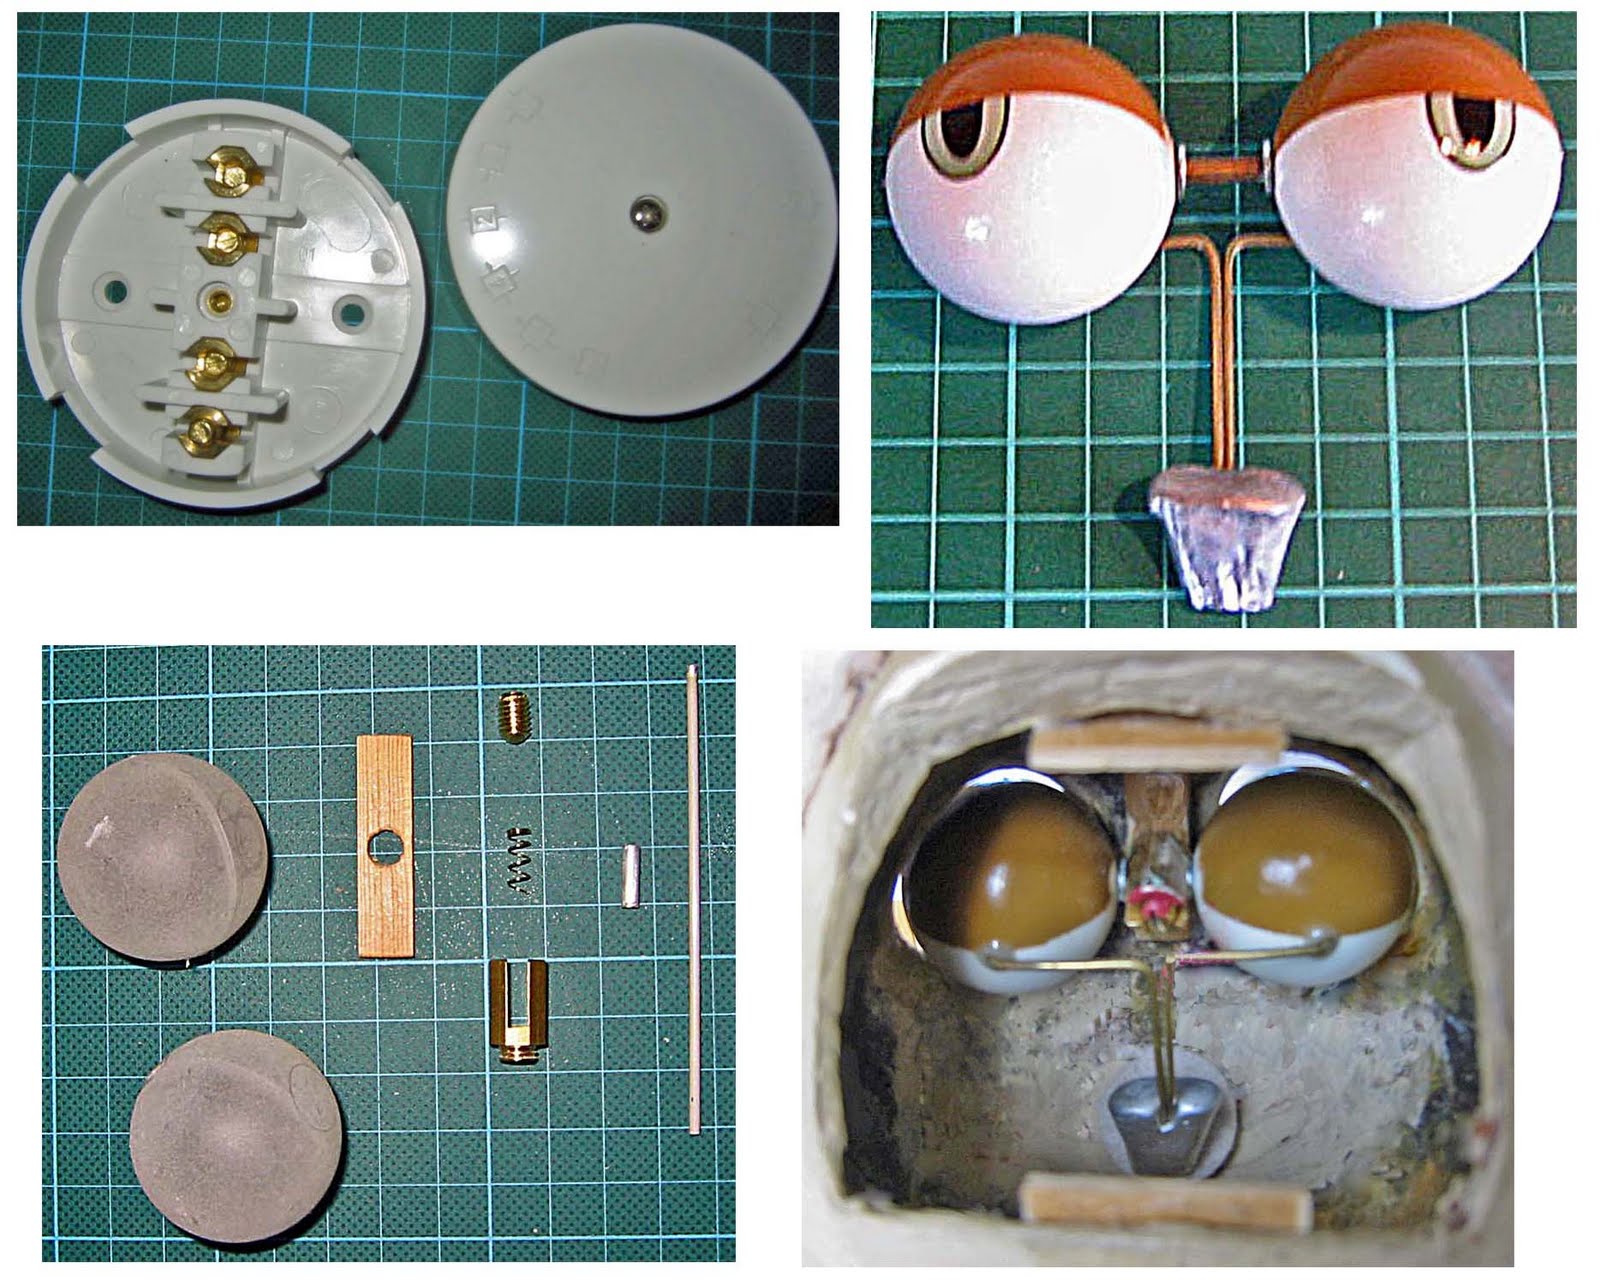
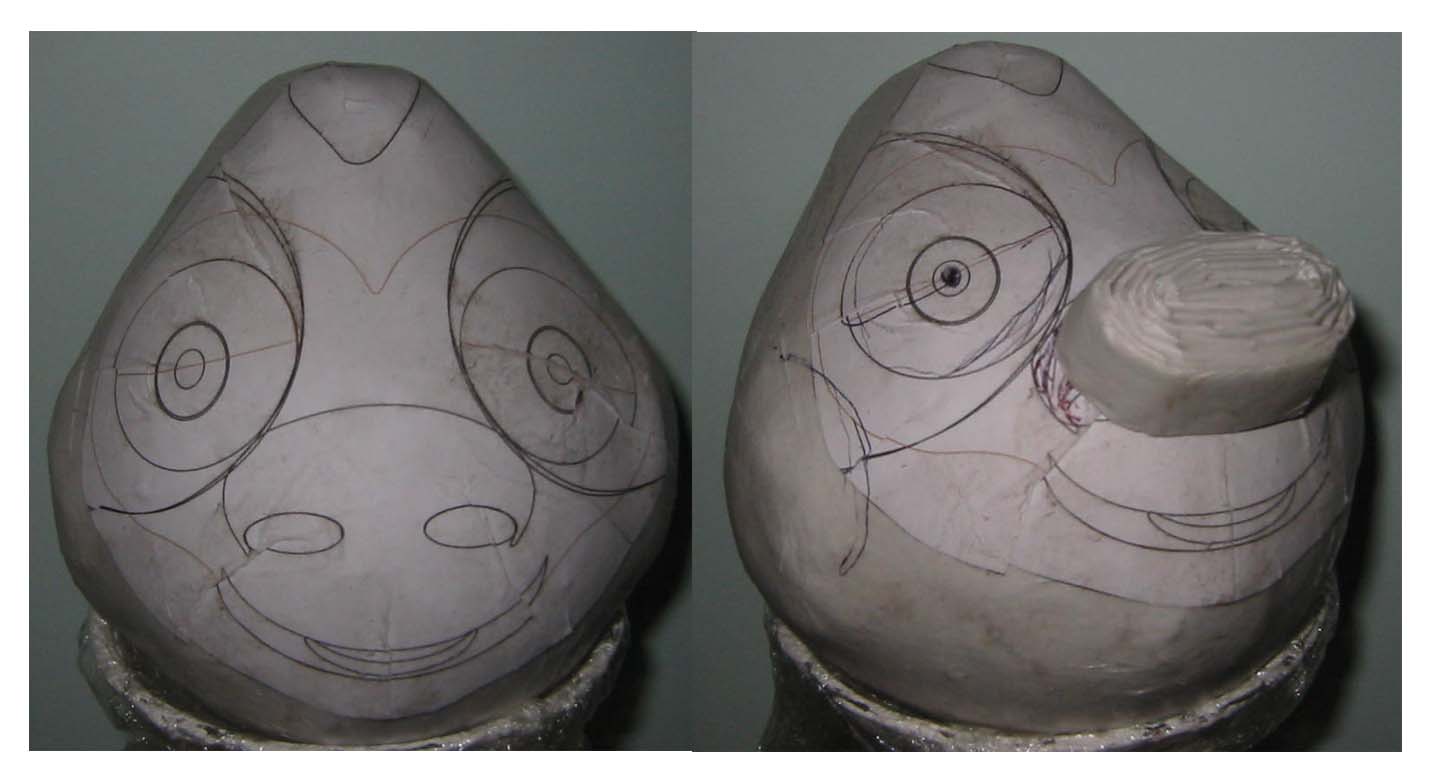 rolled tissue which can be sanded and shaped when fully dry. A sketch of the facial featues was pasted to the head to help with positioning and moulding. At this stage a neck piece was added made from a domed tube which again was formed from tissue/glue and strengthened with plaster bandage over a former which in this case was the end of a rolling pin. The eye holes were cut to match the eyes which are the roller balls taken from roll-on deoderant containers with a diameter of 32mm.
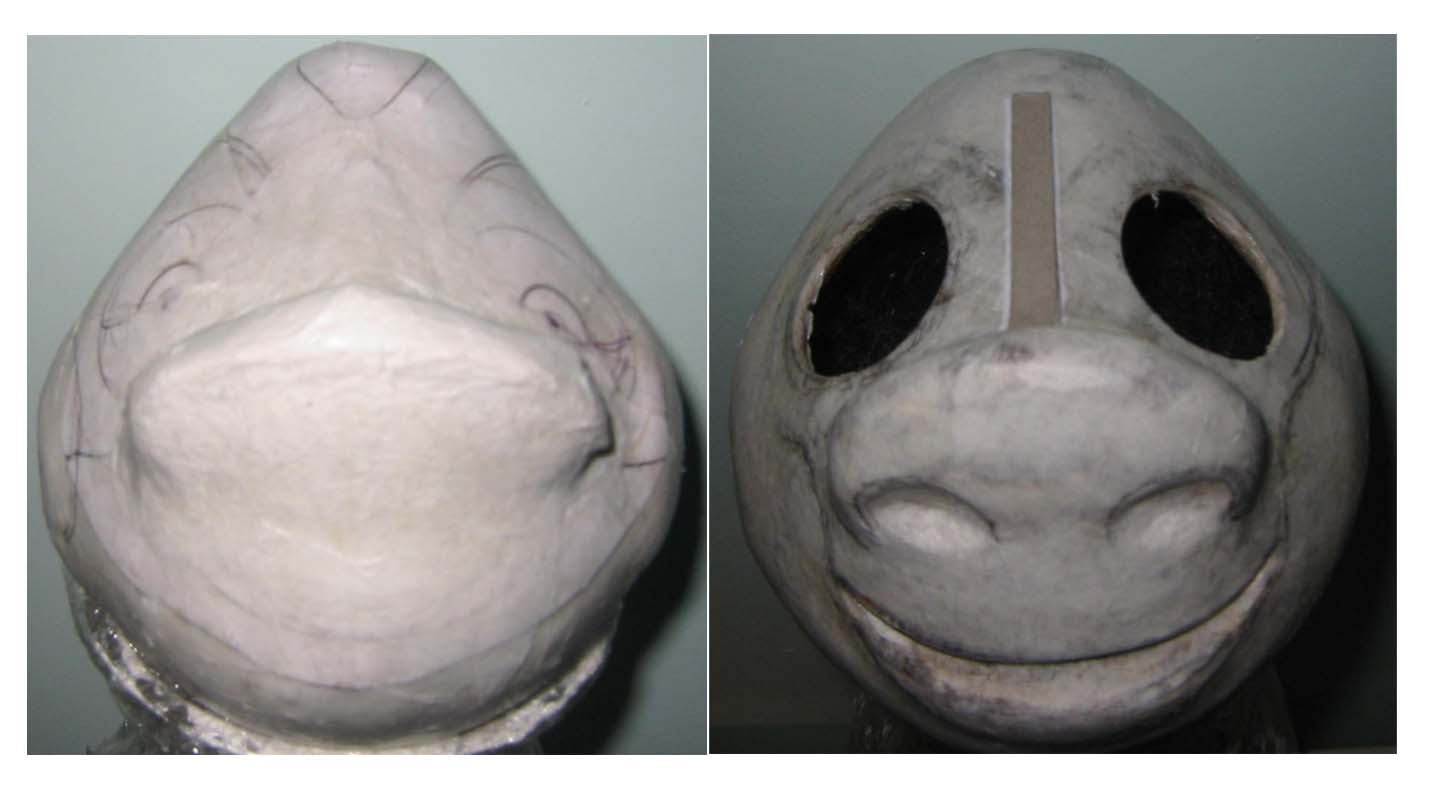
I made the eyes moveable by fitting a pivot bar and weight arm and attaching to a post inside the head. The post has a spring loaded screw adjustment which allows the eyes to be positioned correctly. An electrical junction box was used for the post with the addition of a small spring. This mechanism is similar to what you would find in vintage dolls.

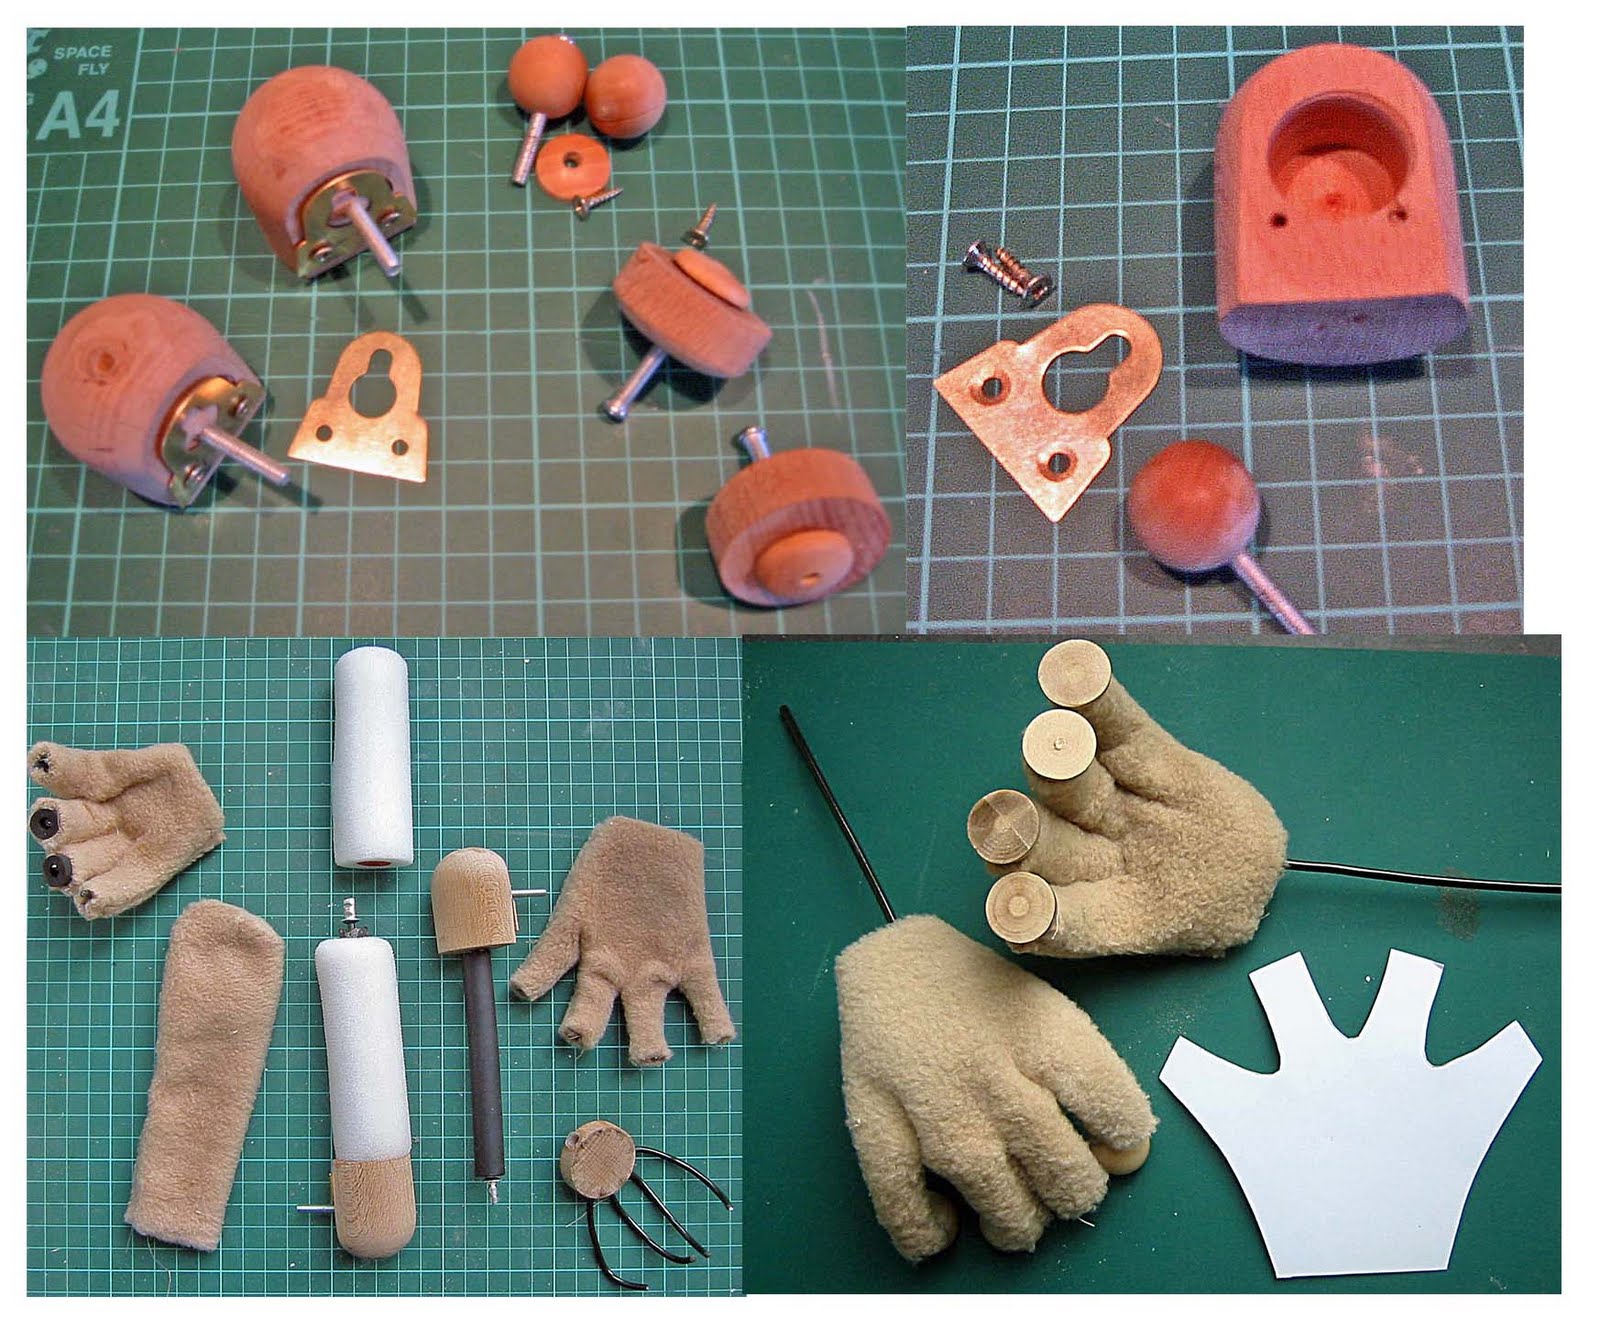
For the arms, a ball and socket joint was made by using a wooden ball drilled through the centre and bolt inserted. This was then fitted to the shoulder dowel into a hole slightly larger than the ball, then held in place by a plate( here I used a mirror plate ). The bolt of this joint is connected to a nut that is glued to another dowel that is part of the body. The pictures will help here to see the way the arms are fitted to the body.
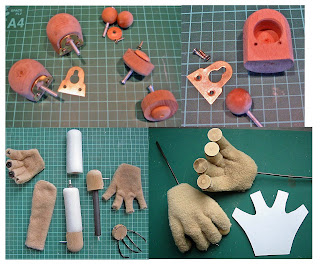 The hands have wooden balls cut in half and attached to the end of the fingers, again using flexible wire to make up the fingers. A wooden disc is used for the wrist and is connected to the arm wire.
 Acrylic paint was mixed in the proportion of 10 parts white, 2 parts burnt umber and 2 parts yellow to get a coffee colour to match the fur fabric. The paint is used on face, fingers and feet before fur fabric is applied. The fabric I settled on was a beige coloured fleece, but was not quite the right colour, so I dyed it using a strong coffee solution ( 4 heaped teaspoons of coffee to a quarter pint of boiling water ). Depending on how much fabric is to be dyed, possibly 2 to 3 pints of solution will be required. After the fabric was fully dry, it was cut, stretched and then glued to the body. The fabric for the arms and legs was cut from pattern templates and then stitched before being fitted over the limbs. The head was covered with fabric with an opening cut out for the eyes and mouth. A wire former was used for the ears with the fabric glued over this and then inserted into the head. A strip of darker longer fur fabric was attached to the top of the head and down the back to point wher a tail was attached. The head and legs are linked together by hooks and elastic cord inside the body which allows movement of these.
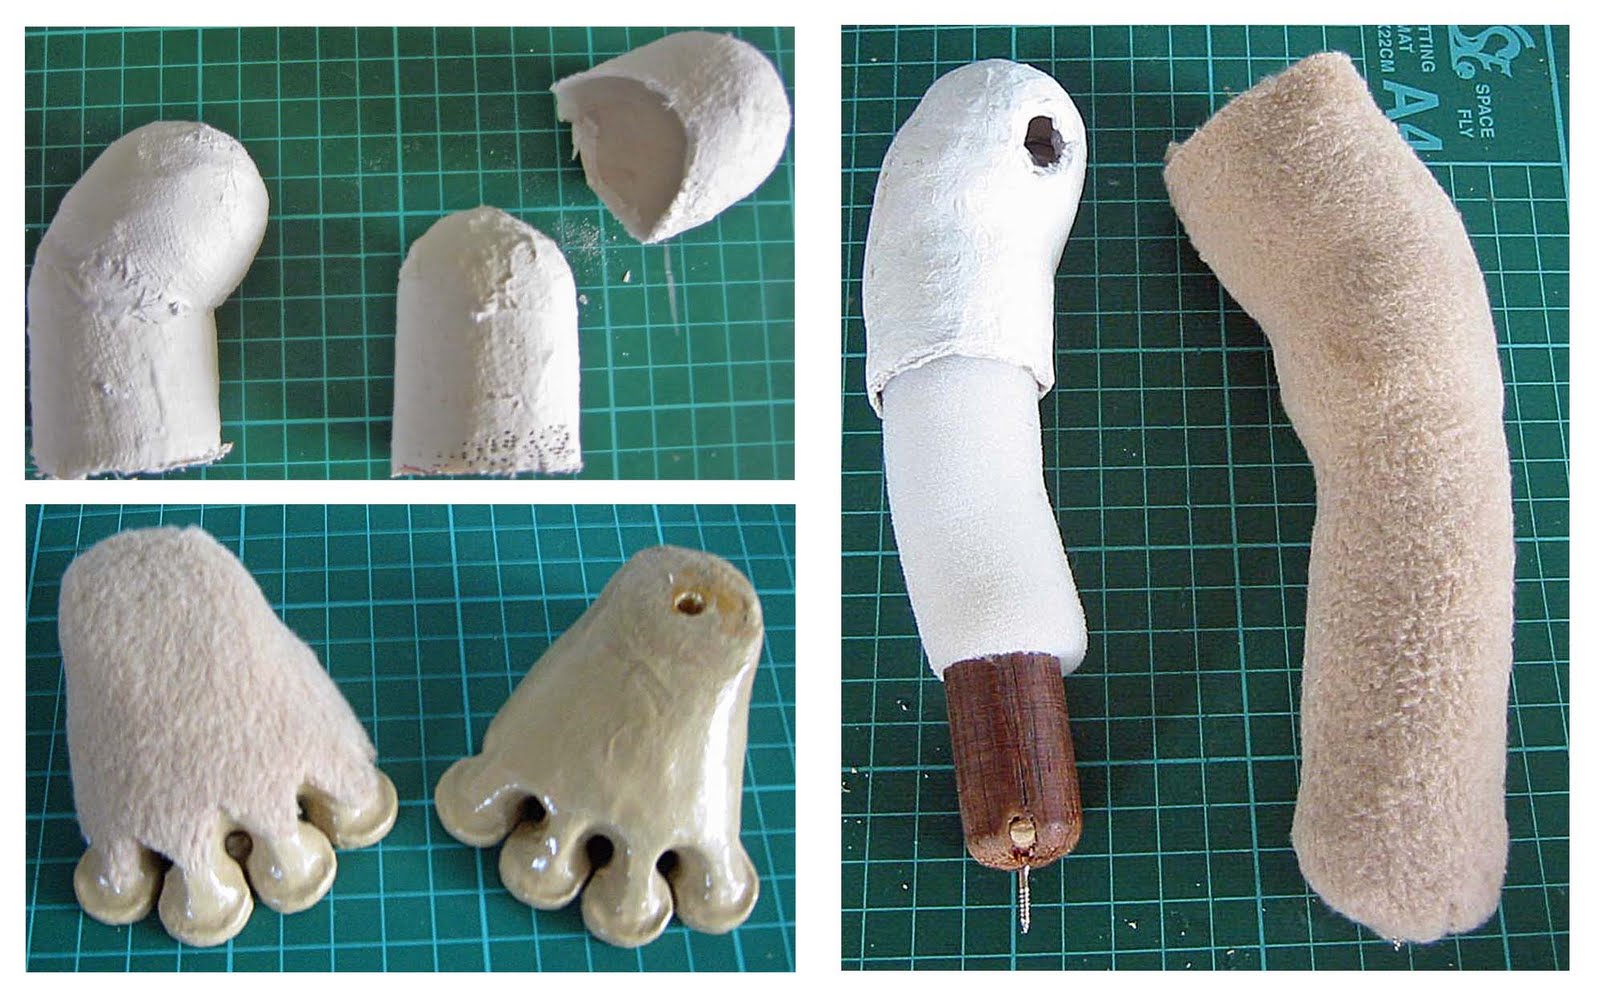
The legs have ball joints made from two sections of domed paper mache /plaster sections which will then fit into sockets on the body made in the same way as the ball joints. Both arm and legs have flexible wire through the centre, covered in a foam sleeve.
 The hands have wooden balls cut in half and attached to the end of the fingers, again using flexible wire to make up the fingers. A wooden disc is used for the wrist and is connected to the arm wire.
The legs are similar to the arms but end in a wooden dowel with a swivel eye that connects to the foot. The feet were made up on a card template using wooden discs for the toes and then built up again using paper mache/plaster bandage. After they had dried out it was then possible to sand and shape the feet before painting.
 Acrylic paint was mixed in the proportion of 10 parts white, 2 parts burnt umber and 2 parts yellow to get a coffee colour to match the fur fabric. The paint is used on face, fingers and feet before fur fabric is applied. The fabric I settled on was a beige coloured fleece, but was not quite the right colour, so I dyed it using a strong coffee solution ( 4 heaped teaspoons of coffee to a quarter pint of boiling water ). Depending on how much fabric is to be dyed, possibly 2 to 3 pints of solution will be required. After the fabric was fully dry, it was cut, stretched and then glued to the body. The fabric for the arms and legs was cut from pattern templates and then stitched before being fitted over the limbs. The head was covered with fabric with an opening cut out for the eyes and mouth. A wire former was used for the ears with the fabric glued over this and then inserted into the head. A strip of darker longer fur fabric was attached to the top of the head and down the back to point wher a tail was attached. The head and legs are linked together by hooks and elastic cord inside the body which allows movement of these.


